Troubleshooting Installs
Tips & Techniques
Call for demo. 855-300-0527
Helpful Installer Links
OBD Locator |GO App Android Market – iTunes Store | Install Logger & Checker | Harness Options
GPS Installation for OBD Devices
Option 1
Plug it into the OBD port and zip tie it in place. 60 seconds
Option 2
Add a harness (y-harness, extension or J-bus). 15 minutes.

Pro Tip
- Read all instructions before starting. There are good tips included which will reduce time off the road.
- Save this webpage to your phone or print the guides for reference when installing.
- Install the Geotab mobile app or save the MyFleetView page on your phone to check for devices reporting.
- The GPS units cannot report to your account unless added to your account online. Check that this is done.
- Work as a team. Do the first install together talking about standards. This will improve standardization, quality and efficiency.
- Document which GO device serial number goes into which vehicle.
- Click here to access the Fleetistics install checker (GO system only) and tracker (all devices).
- Place a GO device serial number decal on the door jam just in case you forget to write down the device serial number. Do this before starting so you don’t forget.

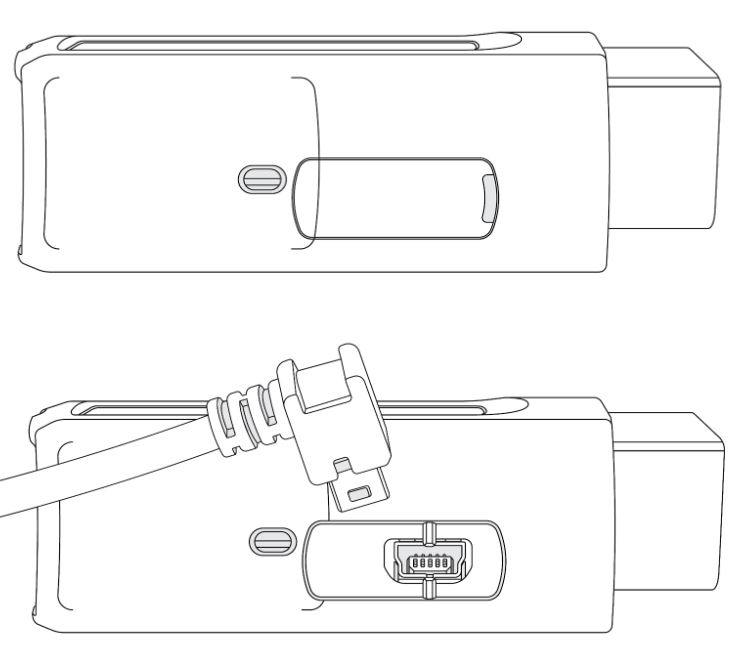
GPS & Y-harness Installation
Many customers will choose to invest in a Y-harness which enables the GPS tracker to be moved into the dash and keep the OBD port open. There are 3 connections on the Y-harness and they are:
1. The vehicles wiring harness coming from the engine
2. The OBD port visible and accessible to you
3. The point where the GPS unit connects to the harness.
If you are installing on a larger truck, Class 6-8, you will need a 6 or 9 pin adapter harness.
Pro Tip
Installation Types
GO9 Installation
OBD GPS Installation, Y-Harness
Once you have located the OBD port, back out the OBD plug by removing the two screws on either side in most cases. Insert the end of the harness with the OBD bracket and secure. Connect the second end of the Y-harness into the vehicles OBD bracket you just removed and the third end to the GPS device.
The Y-harness and all harnesses are custom designed and built by Geotab. You cannot buy a harness on Amazon and get it to work properly. Investing in the right harness will ensure optimum performance.
OBD GPS Installation, No Harness
To find the OBD port look on the driver’s side in most small passenger cars and light duty trucks. If you are installing on a big truck just look for the large round port of a J-bus connector. The OBD port will be located somewhere between your knees and your left ankle and may be behind a door or it may be facing directly down behind the lip of the plastic panel. Get under the dash and look around. Click here to use an OBD locator guide if you get stuck.
When installing without a harness be sure the GPS unit will not be broken by the driver hitting it repeatedly. This is not covered by warranty. Once inserted into the OBD port and lights come on, use 1 or more zip ties to wrap around the GO device. Be sure you do no damage the wires on the back of the port but make it snug enough so you will know if anyone tampers with it. Your GO tracker will come with serial number zip ties to further deter tampering. Click here to read more on introducing GPS tracking to employees.
3-Wire Installation
The wiring connections should be done with the heavy wires coming from the steering column, do not connect to the cigarette lighter adaptor, that is old school. Use a multi-meter to find the proper wires and complete the connections. Cover connections in heat shrink tubing or electrical tape to prevent a ground and blowing fuses. Make note of the wire location and color for easy future reference.
Using a test light on new vehicles may cause damage to the computer system. Use a multi-meter designed for automotive applications. When unsure, hire a professional installer. Pro installers often save you time and money considering the cost of downtime of a vehicle or paying a wage for a slow install. Fleetistics can help you find an installer, project manage the installation or just talk you through it.
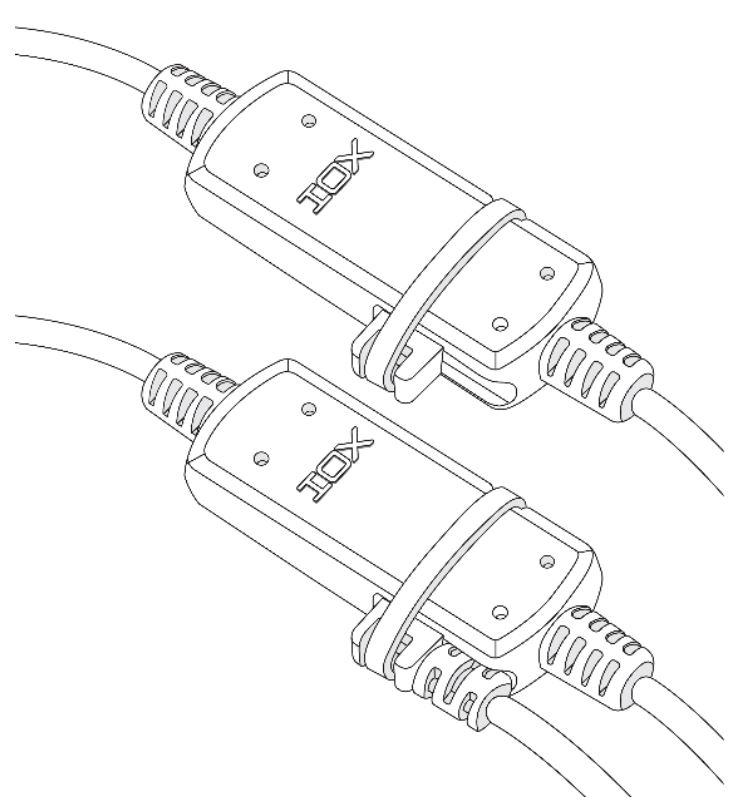
GO IOX Installations
There are a wide variety of IOX connectors available that connect to the GPS unit through the small port on the side of the Geotab GO device. IOX are used for add-ons such as Driver ID or GO Talk. IOX connectors can be daisy chained together to provide very custom hardware configurations. Contact your account manager to learn more or visit our IOX web page.
Some IOX options are:
- Driver ID with NFC
- Garmin ELD
- GoTalk speaker
- Dickey John spreaders
- Auxiliary input monitoring
- Valor tire pressure monitoring
- Reefer temperature monitoring
- Beacon monitoring
- Bluetooth connection
Secure the IOX connections with a zip tie
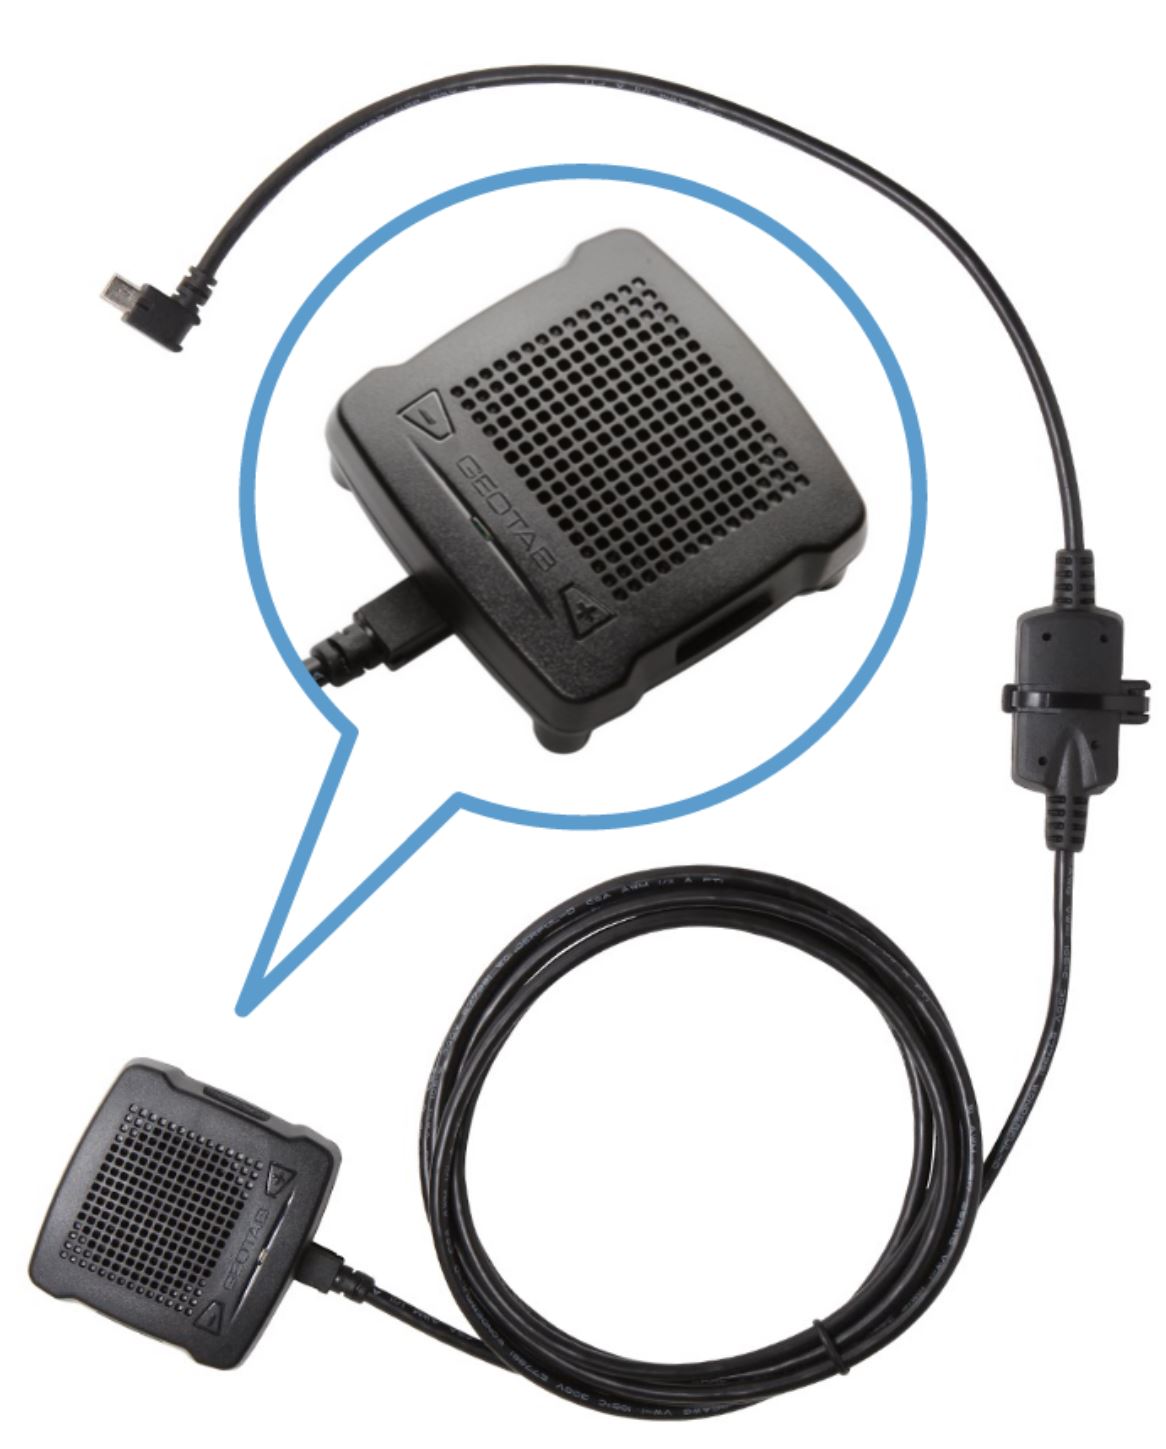
GoTalk Installation
GoTalk adds a speaker to the Geotab GPS tracking platform to give the driver more specific feedback. Customers create the message to be read to the driver using the Geotab web interface. Let’s just say you can be as creative and colorful as you like. Installing the GoTalk speaker is very similar to connecting any other IOX device to the GPS device. Click here to download the full GoTalk installation guide. There are a few key things to remember.
- Make connections in the sequence outlined in the installation guide.
- Connection GoTalk to the IOX port first.
- Connect the OBD harness to the Geotab GPS device.
- Turn the vehicle on.
- The unit will be in test mode. Cycle the ignition a few times to disable it.
Note: Each time the GPS device loses power it will be in test mode when reconnected. Cycle the ignition a few times to turn it off or it will beep while driving giving you feedback on everything it does. Test mode is used for troubleshooting and is very helpful when something is not working correctly. You may want to create a rule that is triggered upon powering the GPS device so you can confirm the installation is correct. After installation, you can remove the rule. Read more
Confirming Installations
Once the unit is installed there are several things to check to know if the unit is functioning properly. It is a good idea to have the mobile app installed on your phone so you can check to see if it reports.
The vehicle may have to be driven to get it to report after installation.
The device will be in test mode. Cycle the ignition a few times to put it in normal operating mode.
Check Your Geotab Device -
Pro Tip
The GPS antenna in the Geotab GO GPS tracker is directional. Meaning that if you mount it with the wrong side facing the metal frame of the vehicle it will not work as well. The antenna is on the bottom of the GPS unit. When looking at the writing on the device, the antenna is below the text. You might think it should be on the top but it is actually on the bottom of the GO GPS device to receive reflected signals from within the truck or car.
GPS Installation Checklist
- Be sure you are in the cellular data network for your device type. Either AT&T, Verizon or T-Mobile depending on your unit.
- Ensure the device is listed in your account. You can install the device and tell it should be reporting but you cannot be 100% sure until the device is added to your MyFleetistics account and you see track data.
- Check for lights
- Power: proper power, ground
and ignition through the OBD port or 3-wire harness - GPS: GPS signal being received
- Network: Data processing server communication
- Power: proper power, ground
- Beeps: There are several beeps and lights which also indicate proper function
- Cycle the ignition a few times or take the vehicle for a short test drive after idling the vehicle for 2-3 minutes. This allows the GPS device to get a position fix memorized for faster future GPS acquisition and GPS latch. If it does not appear after idling, take it for a spin.
Troubleshooting
If you installed the Geotab GO device and you cannot see it on the map after the above steps, you may have a bad OBD harness on your vehicle. If it is your first vehicle, move to another truck with a different GPS tracking device and see if it also fails. If you get two device failures, it is likely NOT a device issue. The failure rate is very low and the odds of two bad devices back-to-back is almost zero. Review the checklist above and see where you missed something or download the troubleshooting flowchart here.
If you have another vehicle that is reporting correctly, install the GPS tracker, or non-reporting device, in the working vehicle and see if it reports. If it reports, your OBD port may be bad on the first vehicle. Consider having the OBD port checked and replaced or order a 3-wire harness for that vehicle. A 3-wire harness will not report engine diagnostics, but it will report accelerometer for driver behavior.
Pro Tip
Opening a Support Case
Problems with new devices don’t happen very often. When everything is done correctly there is less than a 1% device failure rate. When you need Fleetistics support please do not call unless you are standing by the vehicle. If you can submit the serial number Fleetistics Support will investigate the issue and then call you back. This means you can continue to work while we investigate your issue. If you are installing after hours, give us a heads up so we can review your plan, training, etc. Install questions are not considered emergencies but we are glad to coordinate with you to have someone available during an install project.
You can open a case by logging into the MyFleetistics app and clicking Help Center > Support > Open Support Case. Click here to login now.
Pro Tip
Most enterprise fleets will keep 1 spare unit active on the shelf for every 100 devices. This enables the customer to conduct an emergency swap and then troubleshoot or replace the device. Most GO customers who purchase at our normal great rates receive a limited lifetime warranty covering manufacturing defects and failures.